Recipe of Homemade No-bake Chocolate Truffle Tart
Hey everyone, hope you are having an amazing day today. Today, we're going to prepare a distinctive dish, Recipe of Ultimate No-bake Chocolate Truffle Tart. One of my favorites. For mine, I'm gonna make it a bit tasty. This is gonna smell and look delicious.
When it comes to cooking wholesome meals for the families, there is obviously some level of dissention among the positions. The good news is that there are recipes that have become healthy but the healthy temperament of the recipes is significantly disguised. What they don't know in these instances shouldn't attract harm their manner (out allergies, which will never be discounted ).
This means at any given time in your cooking cycle cycles there is quite probably some one somewhere that's better and/or worse at cooking more compared to you. Take advantage of this because even the very best have bad days in terms of cooking. There are many men and women who cook for different factors. Some cook as a way to eat and live while others cook since they actually enjoy the whole process of ingestion. Some cook through the times of emotional trauma and others cook out of utter boredom. Whatever your reason for cooking or learning to cook you should always begin with the fundamentals.
There are lots of magazines and books which can be full of recipes which encourage healthy eating and cooking habits. If you really like to cookthen there isn't any shortage of recipes which you can decide to try along the way. The really good news is that you can incorporate wholesome cooking in your cooking routine whether you're cooking for one or a household .
Many things affect the quality of taste from No-bake Chocolate Truffle Tart, starting from the type of ingredients, then the selection of fresh ingredients, the ability to cut dishes to how to make and serve them. Don't worry if you want to prepare No-bake Chocolate Truffle Tart delicious at home, because if you already know the trick then this dish can be used as an extraordinary special treat.
As for the number of servings that can be served to make No-bake Chocolate Truffle Tart is 6 servings. So make sure this portion is enough to serve for yourself and your beloved family.
To begin with this recipe, we have to first prepare a few ingredients. You can cook No-bake Chocolate Truffle Tart using 5 ingredients and 24 steps. Here is how you can achieve that.
When I uploaded a baked chocolate tart with egg, I received feedback that a user made a no-bake version, so I tried it out. Use 47% fat heavy cream. If you use heavy cream with low fat or vegetable based whipped cream, it might not harden. When using chocolate bar, you don't even have to chop it up. You can just break the chocolate bar into 1 to 2cm blocks, then it will melt. You can use a milk carton as a mold if you don't have a cake pan. Recipe by Hamumaki
Ingredients and spices that need to be Make ready to make No-bake Chocolate Truffle Tart:
- 230 grams Chocolate
- 200 ml Heavy cream
- 120 grams Plain biscuits
- 80 grams Butter
- 1 Cocoa powder (for decoration)
Steps to make to make No-bake Chocolate Truffle Tart
- I used these cubed chocolates. It will be too sweet if you use milk chocolate. Use bitter chocolate if you like it slightly sweet!

- Use one pack (44 pieces) of cubed chocolate. If you are using chocolate bars, use about 4 bars.

- These biscuits are sold in the 100 yen shop. It weighs 120 g.

- Make a 1 cm cut into the biscuit bag, to remove the air. Tape it back together and crush the biscuits finely with a rolling pin.

- Microwave the butter for 20-30 seconds to melt it. (adjust the time accordingly.)

- Open up the biscuit bag, and pour in the melted butter. Mix together very well.

- Line the sides of a springform pan with parchment paper, and press in the mixture from Step 6. (you do not have to line parchment paper on the bottom.)

- Gently flatten the surface by pushing hard with a spoon or spatula to harden and meld the crumbs together.

- Chop the chocolate roughly to make it easier to melt, and put it in a bowl. Put heavy cream in a pan and simmer.

- When the heavy cream has warmed up, immediately pour it in the chocolate. (The pieces of chocolate melted even though I did not chop them.)

- Immerse the chocolate so that you do not see it, and wait for about 30 seconds to 1 minutes without stirring. (This is to heat up the core of the chocolate before mixing.)

- Try not create bubbles and stir gently to melt the chocolate. (It will be difficult to stir at the beginning, but continue stirring. Place the bowl on a double boiler if the chocolate has difficulty melting.)

- It will become shiny when everything is mixed evenly, so continue mixing until it becomes shiny. (Be careful not to create bubbles!) You can also add a little bit of your favorite liqueur if you like !

- Attention: Make sure to keep about 150 g of Step 13 for decoration in another bowl when it is ready. Make sure to mix the batter well in Step 13, because if you don't it mix well, it might not stiffen.
- Pour Step 13 into the cake pan from Step 8 and chill in the refrigerator to firm up. (Let it chill until the evening if you made it in the morning, and let it chill overnight if you made it in the evening.)

- Take it out of the mold when the chocolate truffles has hardened. You can also say that it is already ready at this point! Or you can sprinkle cocoa powder on the surface. In that case, don't keep some of the chocolate mixture for decoration in Step 14 and pour all of the mixture into the cake pan to let it all harden.

- If you kept some of the chocolate mixture from Step 14, keep it in the refrigerator. Mix it with a rubber spatula, then it will be ready to put in the pastry bag.

- After taking removing the sides of the pan and the parchment paper, slightly mark the cake where you are going to cut it before eating using a knife. (This process is to make it easier to know where to squeeze out the chocolate mixture in the next step.)

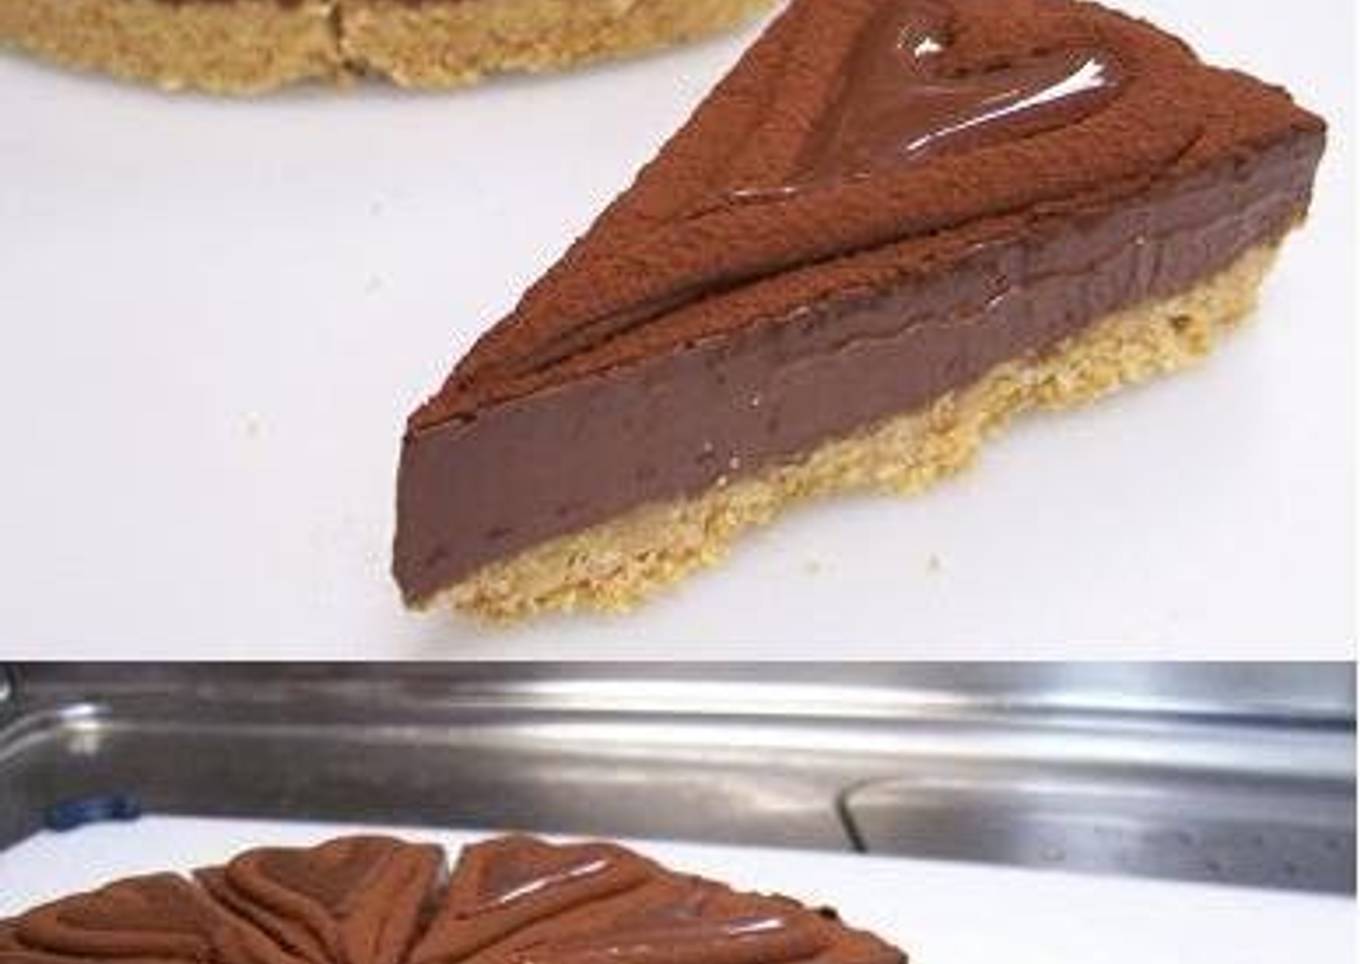
- This time, I used a round tip which is about 5 mm to squeeze out the chocolate mixture from Step 17, and made a heart shape. (Save any of the chocolate mixture remaining after decorating.)

- Sprinkle cocoa powder using a tea strainer.

- Slightly warm up the chocolate mixture remaining from Step 19 to make it creamy. (Be careful not to burn it. You can heat it up quickly over direct heat. You can also warm it up with a double boiler).

- Pour the mixture from Step 21 into the middle of the heart shape using a spoon.

- The thickness of the tart when it is ready is pretty thin, so if you want to make it thicker, use more chocolate and heavy cream, or use a smaller cake pan. You can even mould this tart in a milk carton.

- I recommend the baked tart. The baked type tart is more difficult to melt than the chocolate truffle tart, so I recommend it if you are going to take it somewhere on a hot day.

While that is in no way the end all be all guide to cooking easy and quick lunches it's great food for thought. The stark reality is that this will get your creative juices flowing so that you could prepare wonderful lunches for your own family without needing to complete too much heavy cooking through the process.
So that's going to wrap it up with this exceptional food Recipe of Speedy No-bake Chocolate Truffle Tart. Thank you very much for reading. I am confident that you can make this at home. There is gonna be interesting food in home recipes coming up. Remember to bookmark this page on your browser, and share it to your loved ones, friends and colleague. Thank you for reading. Go on get cooking!
Post a Comment for "Recipe of Homemade No-bake Chocolate Truffle Tart"